Asthma Action Plan, Fill-In Template (Free Download)
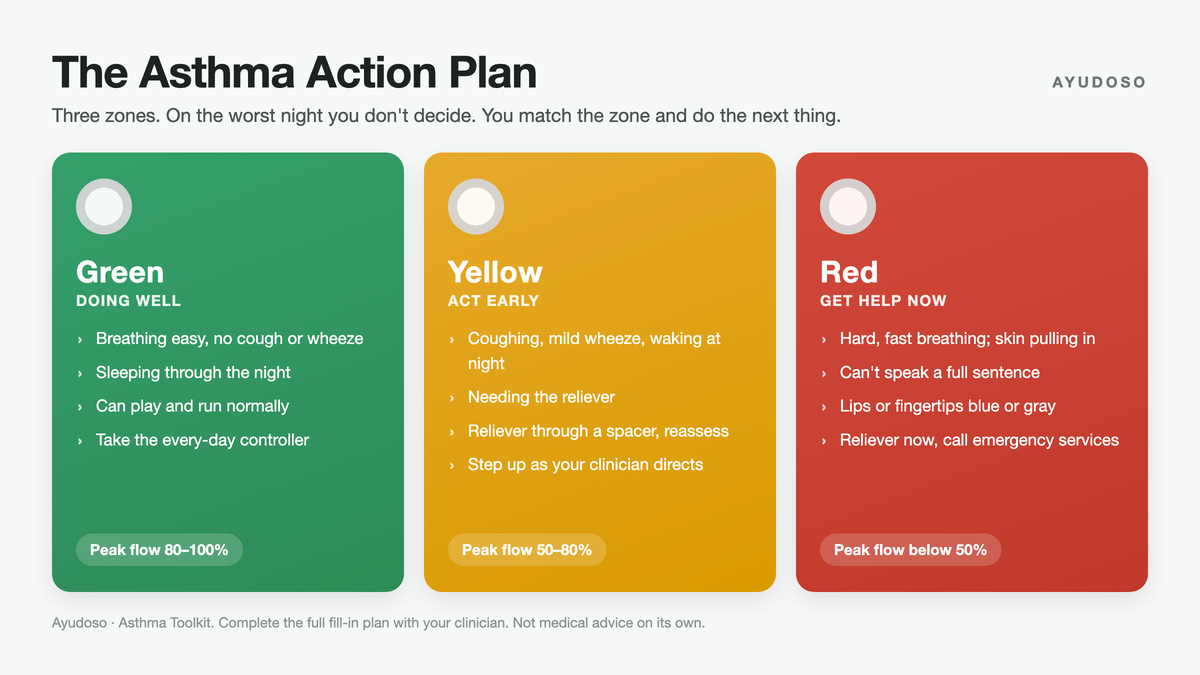
This is the working template behind The Plan Is for the Moment You Can't Think. Every blank on it is blank on purpose: the medicines, doses, and numbers all come from your clinician, not from a website. Print it, fill it out together on a calm day, and post a copy where every caregiver can find it (and a second copy in the bag that travels with the child). The point is that on the worst night nobody has to decide anything, you read the breathing, match the zone, and do the next thing.
This page walks the template so you know what each zone is for and what you will be asked to fill in. The printable at the bottom is the template itself.
👀 First, read the breathing (before you match a zone)
Watch the chest and neck, do not just listen for a wheeze. A quiet chest can be worse, not better. The signs a child is working to breathe:
- Skin pulling in at the neck, or between and under the ribs, with each breath
- Belly breathing, or nostrils flaring
- Breathing fast, or pausing to breathe mid-sentence or mid-sip
- Hunched over, hands on knees, will not lie down
- Your gut says something is wrong. That counts as real data.
Match what you see to the zone below, and do the next thing.
🟢 GREEN ZONE, Doing well
Signs: breathing easy, no cough/wheeze, sleeping through the night, can play and run normally. Peak flow about 80 to 100% of personal best.
What your clinician fills in here: the every-day controller (medicine, dose, and when), taken even when feeling fine, and the pre-exercise reliever with its timing, if one is prescribed. Green is not "no plan," green is the plan working.
🟡 YELLOW ZONE, Getting worse, act early
Signs: coughing, mild wheeze, waking at night, needing the reliever, can still talk in sentences. Peak flow about 50 to 80% of personal best.
What your clinician fills in here: the exact reliever with puffs and spacer, how long to wait before reassessing, how many times it may be repeated in the first hour, whether and how to step up the controller, and the point at which you call the clinic instead of continuing at home. There is also a line for the first-sign-of-a-cold plan, if your clinician sets one. Yellow is the zone where acting early is the whole game, which is why every step gets written down in advance.
🔴 RED ZONE, Get help now
Signs (any one): hard, fast breathing. Skin pulling in at the neck or ribs. Can't speak a full sentence. Lips/fingertips blue or gray. Reliever not holding or wearing off within a couple of hours. Too drowsy to rouse. Peak flow under about 50% of personal best.
Do this:
- Give the reliever now, the puffs your plan names.
- Call emergency services / go to the ED immediately. Do not wait to see if it passes.
- Keep giving the reliever on the way, at the interval your plan directs.
The template's red section holds those exact numbers plus the emergency contacts, filled in ahead of time, because red is the zone where nobody should be reading anything longer than a line.
Where this fits: built to operationalize The Plan Is for the Moment You Can't Think and the red-flag thresholds in What Working to Breathe Looks Like. The green/yellow/red peak-flow percentages come from Peak Flow Is a Trend, Not a Verdict, which is also where the evidence behind them sits. This template is a tool to complete with a clinician, not medical advice on its own.
Print it. Fill it in with your clinician on a calm day, or bring it blank to the next visit and fill it in together.
The download is free, one email unlocks it and the whole Asthma Toolkit.
Comments ()